|
|
This will give you some of the logistics and information you will need to run a paper roller coaster contest like mine. I purchased the paper roller coaster track templates from: http://www.paperrollercoasters.com The templates are inexpensive and reusable. Read the copy and use license that comes with templates. One set of templates per classroom. I'm not affiliated with "paperrollercoaster.com." I teach physics at Albemarle High School.
I have two sets of contest rules so I can alternate years.
The dimensions of the coaster are chosen for a couple of reasons.
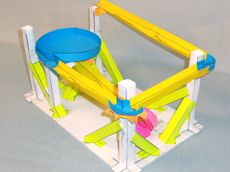
For the cyclone, (2012B contest,) track design I gave each student:
Here is what I gave for the other, (2012A contest,) non-cyclone, paper coaster contest.
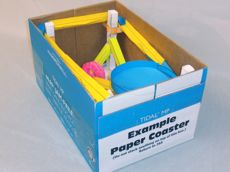
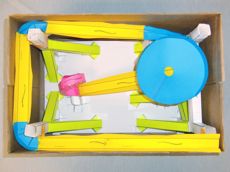
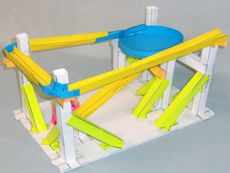
I do not use the strap pieces because the coaster tracks are not going to last that long. Humidity can quickly affect the stiffness of the wall of the track pieces. If it is a problem, use the strap pieces. If you look closely at my paper box sized coaster, the walls of the track have curled. This is due to summer humidity in my room and because I do not have a strap across the top of each track piece. There are two ways to distribute templates. One is to have them laid out on the counter with a number in front of each stack telling the students how many to take. I also have some grouped and sorted into what I call a "track pack." I place these track packs in paper boxes. I'll use the presorted track packs after I use up all the others. Below are some pictures of what the back counter of my room looks like.
|
||||||||||||||||||||||||||||||||||||||||||||||||||||||||||||||||||||||||||||||||||||||||||||||||||||
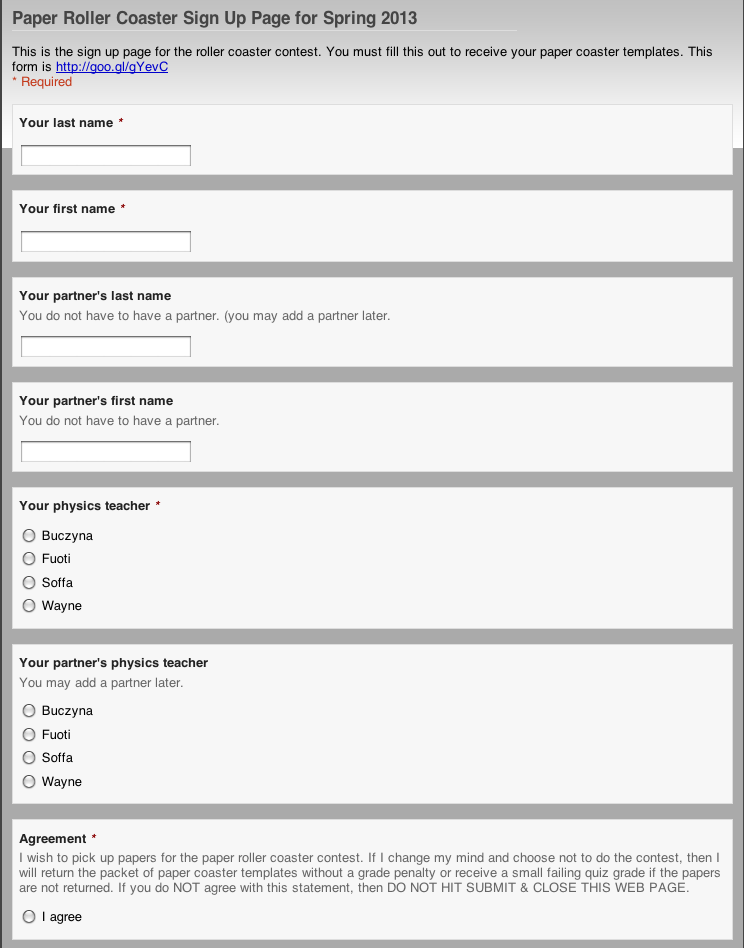
Before anyone receives a track pack, I make them commit to the project by signing in on the Google Form shown below.
|
||||||||||||||||||||||||||||||||||||||||||||||||||||||||||||||||||||||||||||||||||||||||||||||||||||
 |
||||||||||||||||||||||||||||||||||||||||||||||||||||||||||||||||||||||||||||||||||||||||||||||||||||
This form is shared among all of the physics teachers involved in the project with the rights to edit it in Google Apps For Education. If you have never used a Google form, all this information gets placed in a spreadsheet. By sharing and giving teachers rights to edit it, they can copy edit, and adjust it to meet their needs. Here is a link to the Google spreadsheet portion of the Google form. If you go to this spreadsheet you will not be able to edit the document. But if you log into your Google Docs accounts and view this page, you will then be able to make a copy of it and edit it. But to do this you must log in to your Google Docs account. The copy will be placed in for account.
|
||||||||||||||||||||||||||||||||||||||||||||||||||||||||||||||||||||||||||||||||||||||||||||||||||||
Judging the coasters by the participants' peers provides an audience. Each teacher places the his or her students coasters on display in their room. On the two days following the deadline I have students from all the participating classes, and any interested teachers, walk between the rooms with coasters in them and play with each coaster to judge it for the bonus category. To pull this off take some additional organization. You know the maximum number of coasters that will turned in because you had everyone sign-up when they picked up the track packs. Have at lest that many envelopes on hand. Sequentially number the envelopes. Give a piece of paper to each team and have them write the following on the paper:
Each envelope and paper should be placed on the corresponding roller coaster. These envelopes will be used for collecting votes. The "envelopes are actually envelopes. I tried that and they would get moved or fall on the floor. I create a piece template for printing on legal paper. The bottom the of the paper folds to create a envelope-like pocket for placing votes. The top of the paper contains information like the coaster's name and the partners name. This make counting and assigning a score easier than when I only used envelopes.
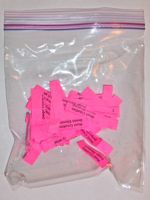
Make slips of paper with the votes on them. Use a different color for each type of vote. Now consider how many voting tickets to print and cut. Each one of my ticket sheets contains 90 tickets to be cut out. We are expecting about 220 students per day and each student needs two tickets because they have two votes. I'm going to need about 440 tickets in each category per day. I'll round this to 500. To cut all these out I'll use the study-halls to help. Reuse the tickets from year to year. Here's my pdf file. Below are some various file types you can use to print your own voting tickets. The bottom of each page lists the color of paper I use to print the votes.
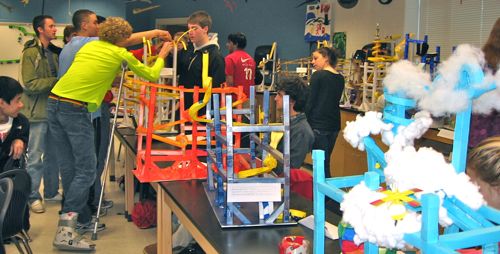
Students walk around for about 20 minutes between all of the classrooms with coasters in them. After about 20 minutes, students all return to their classes. I also invite teachers and the administration to join in and vote when the students do.
At the end of the day or when you are running out of voting slips, have the students get the envelope from each coaster in the classroom and add up the votes in the classroom. Make sure the student leave the paper on the coaster. Then spend a few minutes entering these votes in the spreadsheet linked above. I have the students count in front of the coaster and then call out the coaster builders and the number of votes in each category to me. If there are more coasters than students, then after the first student gives you their data, have him or her go to another coaster. This whole tallying process takes about 10 minutes. After all the votes for a class have been tallied, the students put the counted votes back in the baggies to be used another day. The envelopes go back with the coaster they came from. This process quickly counts the votes and sorts the the voting tickets. If every teacher in every room is doing this and putting the vote tallies in the same Google spreadsheet, then this arduous task becomes very manageable. |
||||||||||||||||||||||||||||||||||||||||||||||||||||||||||||||||||||||||||||||||||||||||||||||||||||
|
||||||||||||||||||||||||||||||||||||||||||||||||||||||||||||||||||||||||||||||||||||||||||||||||||||
| Have a long 6 or 9 week project where every class builds a super sized roller coaster in the back of the room. Every class builds on the same roller coaster. Whenever there is down time or perhaps during a time when students have a choice, they build onto the same single huge paper roller coaster. When I have done this, the coaster ended up being about 10 feet long and 5 ft tall. It was amazing. Behavior problems were nearly eliminated bacause nobody had idle hands and they worked hard to finish their work. | ||||||||||||||||||||||||||||||||||||||||||||||||||||||||||||||||||||||||||||||||||||||||||||||||||||
by Tony Wayne ...(If you are a teacher, please feel free to use these resources in your teaching.)
The owner of this website does not collect cookies when the site is visited. However, this site uses and or embeds Adobe, Apple, GoDaddy, Google, and YouTube products. These companies collect cookies when their producs are used on my pages. Click here to go to them to find out more about how they use their cookies. If you do not agree with any of their policies then leave this site now.